In today's digital age, visual appeal and captivating real estate photography plays a crucial role in attracting potential buyers to your real estate listings. High-quality photographs are an essential marketing tool that can significantly impact a buyer's decision-making process. It may be easier to make a mansion with a grand ballroom and ornate marble staircases look great, but how about that less-than-gorgeous home with peeling wallpaper and warped floors?
As a real estate agent, mastering the art of capturing captivating images of your listings can help you stand out from the competition and generate more leads. In this blog post, we'll share valuable tips to help elevate your real estate photography, so you get mistaken for a professional photographer!
Use Proper Equipment:
Investing in a decent camera and a wide-angle lens can significantly enhance the quality of your real estate photography. A wide-angle lens allows you to capture more of the room in a single frame, making the space appear more spacious and appealing. Tripods are also invaluable for reducing camera shake and producing sharper images, especially in low-light conditions.
Shoot on a Tripod, Even in Bright Light
The amount of gizmos available for photography is enough to make your head spin. However, if there is one tool that is an absolute necessity for real estate photography, it’s a high-quality tripod. Photographers always have this tool in their arsenal because they make taking consistently great pictures much easier.
Here are some benefits of taking every single one of your shots with a tripod:
- Reduce or even eliminate the odds of taking blurry pictures
- Take multiple pictures from exactly the same height and angle
- Most tripods have built-in levels to ensure your photos are straight
- You need a tripod to take longer exposures at dusk or in dimly lit rooms
- A tripod can double as a stand for lights or 3D cameras
There are many tripods created specifically for iphones too!
No Camera? Schedule your Shoot for Early Morning or Late Afternoon
That being said, you can totally achieve stunning photos without the fancy camera, using this simple tip. More important than the type of camera you use or your photography background, is the time of day you schedule your shoot.
If you want to snap pictures on your iphone that look like they’ve been taken on a $6000 camera, schedule your shoot for early morning or late afternoon when the sun is closest to the horizon. This is known as the “golden hour”. Here’s why it’s so important for your listing pictures:
- The golden hours of early morning or dusk are perfect for dramatic hero shots of the home’s exterior. Many photo editors fake dusk shots; why not capture them for real?
- You will get bright sun for interior photos after golden hour in the morning, or before golden hour if you start your shoot in the late afternoon
Proper lighting is crucial for creating visually appealing real estate photos. Natural light is often the most flattering; open curtains, blinds, and turn on all available lights to ensure a well-lit environment.
Capture Different Angles:
Taking photographs from multiple angles can provide potential buyers with a comprehensive understanding of the property. Capture wide shots that encompass the entire room, and then focus on specific details and close-ups. Varying your perspectives will help buyers visualize themselves in the space and provide a more accurate representation of the property.
Look for Unique Details and Vignettes
The devil’s in the details. Including shots of trendy details of your home that get buyers excited is an excellent way to get those calls pouring in. Furthermore, this is a great way to divert attention away from any flaws in the home. Therefore, be on the lookout for any details that make your listing unique or desirable.
One trick in professional real estate photography is shooting vignettes. These are tightly cropped, lifestyle shots that help a potential buyer visualize themselves living in the home. Look for cozy seating areas, interesting art, or any other area that oozes charm.
Pro Tip: Schedule a Virtual Tour on the Same Day as Your Shoot!
Every image you post on your website or listing systems needs to be high-quality and consistent. This includes your virtual tours, which should be added on your real estate agent website, MLS listing, and any other platform you use to advertise your listing.
Firstly, scheduling your virtual shoot on the same day as your shoot allows you to ask your homeowner to occupy themselves with something outside the home once. Secondly, when a buyer scrolls through your tour, the rooms should be as brightly lit as in your listing photos.
Day of the Shoot
Do a Final Walk-Through Before You Start Shooting
Even if your homeowner was super meticulous with cleaning and decluttering, it’s always good to get a second pair of eyes. Despite their best efforts, they are bound to miss a stack of boxes in the corner or a streaky window. Do your best to offer a second opinion and address what you find. Read our previous blog post for tips on helping your clients prepare their listings like pros!
Showcase Key Features
Every property has unique selling points that make it stand out. Focus on capturing these features in your photographs. Whether it's a stunning view, a spacious kitchen, or a luxurious bathroom, highlight these aspects by using angles and compositions that showcase their best attributes. Use leading lines to draw attention to focal points and create a sense of depth and dimension.
Including shots of beautiful details and vignettes that get buyers excited is an excellent way to get prospective buyers to pick up the phone. As well, this type of real estate photography is an excellent way to draw attention away from any flaws in the home. So be on the lookout for any details that make the home unique or desirable and make a mental note to shoot them.
A vignette is a tightly cropped lifestyle shot of a specific area of the home, which shows off the lifestyle of the homeowner to help a potential buyer daydream about living there. Look for cozy seating areas, interesting art, or any other area that oozes charm.
Create a Shot List Based on Your Walk-Through
Planning a list of the order of rooms and details you will shoot will save you a headache when it comes to sorting through photos when you’re back at the office. In most cases, you’ll want to shoot in the same order your pictures will be on your MLS.
It is recommended that you capture at least three angles of every room, plus any details or vignettes.
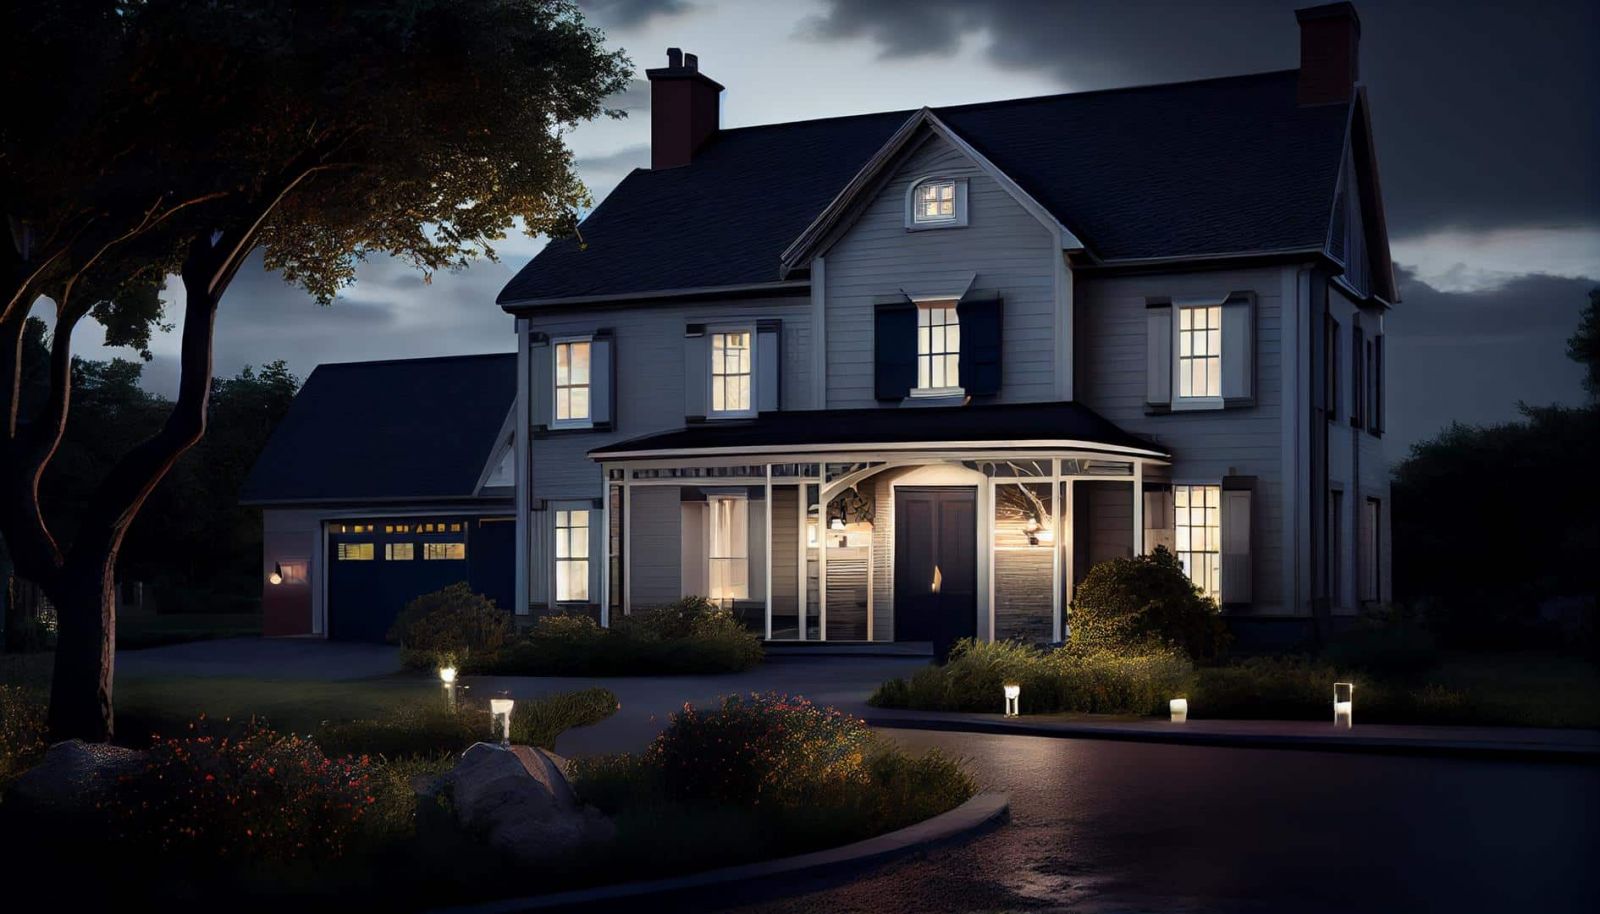
Night architecture outdoors dusk building exterior tree grass illuminated ,generative artificial intelligence
Another tip is to shoot the exterior of the home twice: once when you first arrive, and once at the end of the shoot. This ensures that you capture that trendy dusk shot of the exterior facade of the home. Remember to turn on the interior lights when you shoot your dusk shot of the front of the home for that warm and inviting glow!
Here is an example of a shot list you can use as a template:
Exterior of the Home: Full Sunlight
The front of the home: One head-on and one from each from angle
The backyard: 1 shot of the view of the yard from the home, 1 shot of the view of the home from the yard, detail shots of the yard
Interior of the Home
Capture three angles as well as details and vignettes of each of the following:
- Living room
- Kitchen
- Primary bedroom
- Primary bathroom
- Guest bedrooms
- Guest bathrooms
- Home office
- Finished basement
Exterior of the Home: Dusk
The front of the home: One head-on, one each from right angle and left angle
Compose your Pictures Using the Rule of Thirds
The rule of thirds is a composition technique that most professional photographers use to produce pictures that just look right.
Here’s how to use the rule of thirds in your listing pictures to nail the composition every time:
- Try to position your camera so that there are roughly three distinct horizontal sections in your image.
- Position at least one focal point of your image in one of the four places the vertical and horizontal lines intersect. A focal point can be anything that stands out in the room.
How to display the rule of thirds grid on your camera:
iPhone: Open your camera app and press settings, then camera, then composition. Finally, tap the toggle on under “grid.”
Samsung Android: Open your camera app and press settings. Scroll down and toggle on the button next to “grid.”
Sony Alpha DSLR: Under menu, go to camera settings, and then grid line.
Nikon DSLR: Under menu, select setup, then display, then grid display.
Canon DSLR: Under the yellow wrench menu, navigate to the fourth submenu: shooting info. Under Disp, choose grid display.
Edit and Enhance…To a Point
Post-processing can significantly improve the quality of your real estate photographs. Utilize photo editing software to enhance brightness, contrast, and color balance. However, it's important to strike a balance between enhancing the image and maintaining its authenticity. Avoid excessive editing, as it may mislead potential buyers and create false expectations.
Finally, Develop a Consistent Style:
Developing a consistent style for your real estate photography can help you establish a recognizable brand and attract potential buyers who resonate with your aesthetic. Consider using similar compositions, lighting techniques, and color schemes across your listings. Consistency builds trust and familiarity, making your listings more memorable.
To Conclude...
As a real estate agent, mastering the art of taking professional-quality photographs is an invaluable skill that can significantly impact your business's success. By following these tips and investing time in improving your photography skills, you'll be able to capture stunning images that attract more buyers, generate leads, and ultimately help you sell properties faster.
However, with all of this in mind, nothing beats getting a good professional photographer to do the property pictures. In the grand scheme, your time is better spent prospecting your leads and connecting with your clients. Good professional real estate photographers will get the proper pictures with the right exposure, lighting, and angles done very quickly - they will also edit the pictures so your listing will look really amazing! Remember, great photos have the power to showcase a property's unique features and evoke emotions that can seal the deal with potential buyers.


Leave a comment